Hello World Example
Visual Studio is a graphical programming environment that allows for rapid prototyping of designs. C# is an event driven environment, meaning all controls, objects, or widgets that you place in a window or form come with their own events that can be fired either automatically or by some user action, such as a mouse click or key press.
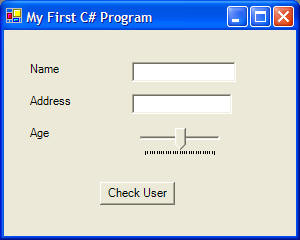
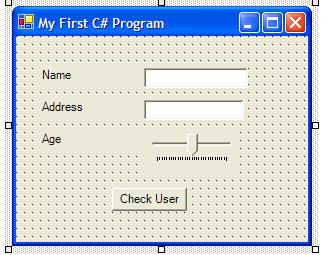
These instructions will build an example program that looks like this:
|
|
Download the code by clicking on the Zip file. |
Instructions for Creating the Example:
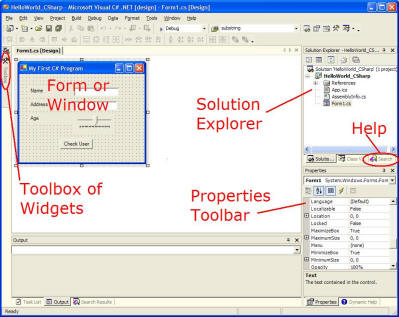
Important Files to Note: HelloWorld.sln is the project file and running it will open up your project in Visual Studio. Form1.cs contains code for a form or window. Form1.resx contains information about the design of a form, e.g., which widgets a form uses and where they're placed. The bin folder contains an executable for your project after compiling.
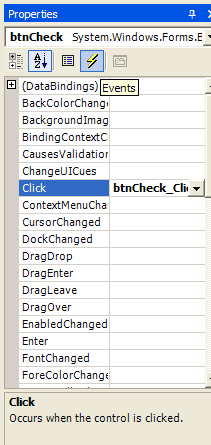
The Toolbox lets you select widgets or objects to place on a form. You can see all the widgets and expand the toolbox by clicking on the Toolbox icon. The Solution Explorer is a listing of all forms or code modules that belong to your project. The Properties toolbar allows you to customize various properties for each widget.
| Button1 | Label1 | Label2 | Label3 | |
| Name | btnCheck | lblName | lblAddress | lblAge |
| Text | Check User | Name | Address | Age |
| TextBox1 | TextBox2 | |
| Name | txtName | txtAddress |
| Text | <make it empty> | <make it empty> |
| TrackBar1 | |
| Name | trkAge |
| Minimum | 0 |
| Maximum | 30 |
| Value | 15 |
Your user interface should look like this so far:

// check the text
property of txtName
if (txtName.Text == "Carman")
{
MessageBox.Show("You rock!", "Name Validation",
MessageBoxButtons.OK);
}
else
{
MessageBox.Show("Error", "Name Validation",
MessageBoxButtons.OK);
}
// check the value property of trkAge
if (trkAge.Value < 5)
{
MessageBox.Show("Youngin'", "Age Validation",
MessageBoxButtons.OK);
}
else if (trkAge.Value >= 5 && trkAge.Value < 18)
{
MessageBox.Show("How's school going?", "Age Validation",
MessageBoxButtons.OK);
}
else
{
MessageBox.Show("Start planning your life...", "Age
Validation", MessageBoxButtons.OK);
}
// reset our controls' properties
txtName.Text = "";
txtAddress.Text = "";
trkAge.Value = 0;
private void Form1_Load(object sender,
System.EventArgs e)
{
// this subroutine runs when your form
first appears
// we will change some properties of our controls at startup
// to access a control's property, type the name of the
control, then a period, and
// finally the property's name
txtName.Text = "";
txtAddress.Text = "";
trkAge.Value = 15;
}
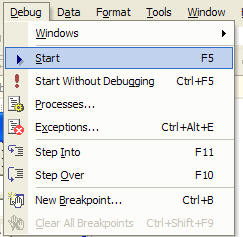
To run your code, go to the Debug menu and choose Start.
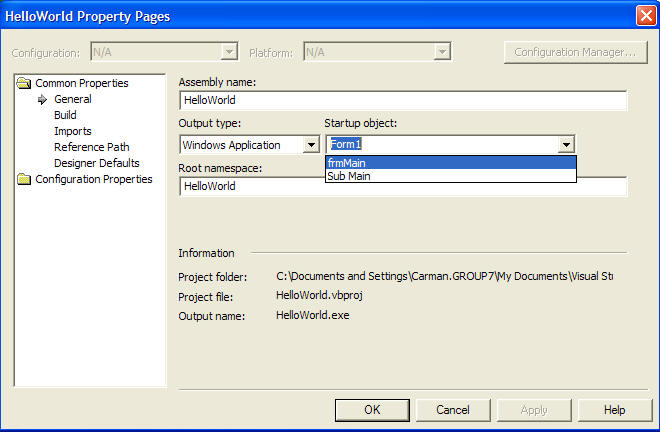
If you get a compile error that says "Sub Main" not found. Right click on your project name and select Properties from the context menu.
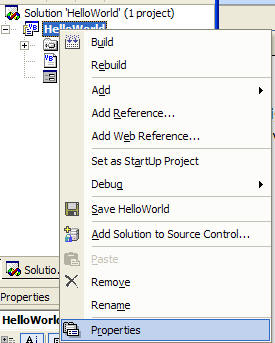
In the dialog window that appears, choose frmMain as the startup object.
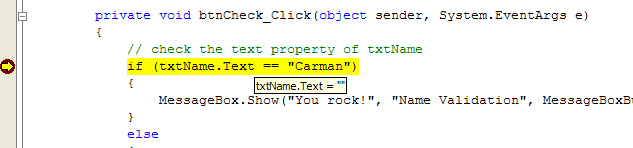
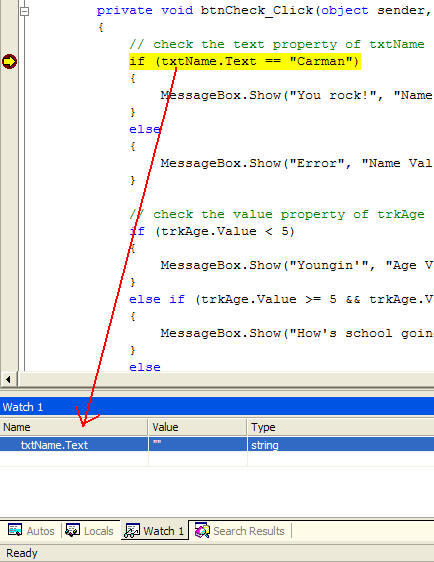
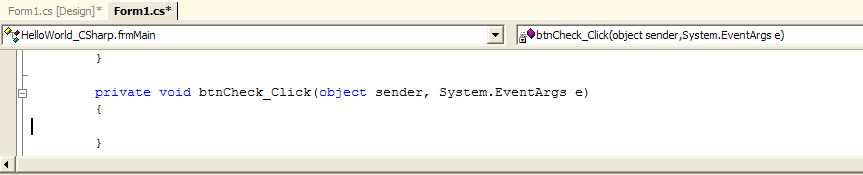
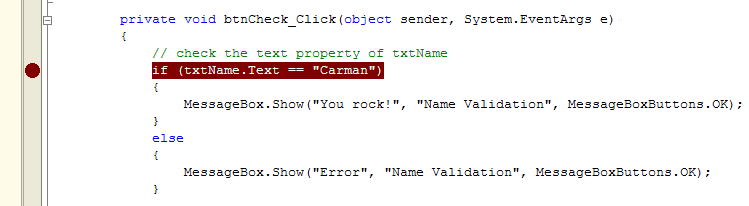
Clicking in the left margin of your code will place a Breakpoint. This means your code will stop when it gets to this line. The highlighted line in the picture below contains a breakpoint.
When your code stops, you can check out what values are contained in objects and variables to debug the current state of your program.
Pressing the F11 key or choosing Step Into from the Debug menu will move to the next executing line of code. Step Into will allow you to go into functions and subroutines should a line of code call a different function or subroutine.
Pressing the F10 key or choosing Step Over from the Debug menu will move to the next executing line of code. The difference between Step Over and Step Into is that Step Over will not go into functions or subroutines if they are called.