Visual Basic Introduction
Visual Basic is a graphical programming environment that allows for rapid prototyping of designs. Visual Basic is an event driven environment, meaning all controls, objects, or widgets that you place in a window or form come with their own events that can be fired either automatically or by some user action, such as a mouse click or key press.
| Download a sample VB program that checks data entry from a user. |
Instructions for Creating the Example:
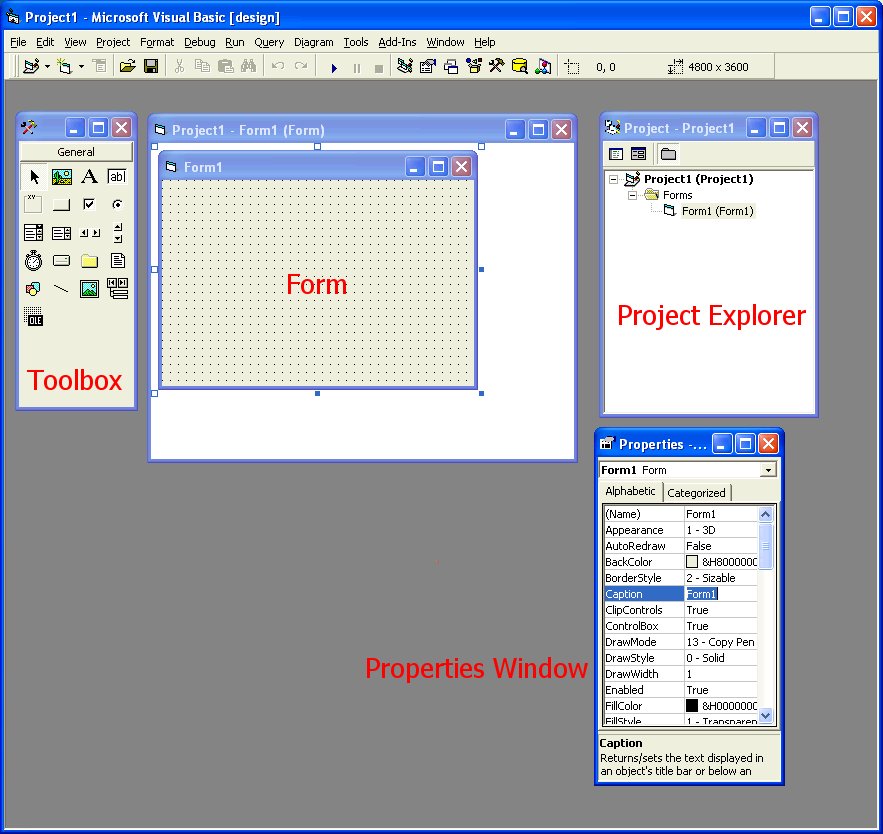
The Toolbox lets you select widgets or objects to place on a form. The Project Explorer is a listing of all forms or code modules that belong to your project. The Properties toolbar allows you to customize various properties for each widget.
If any of the toolbars are not visible, go to the View menu to show them.
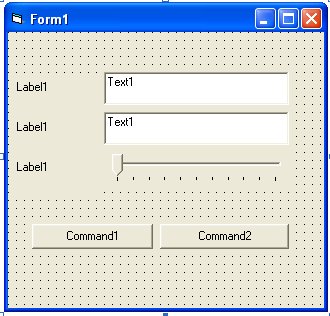
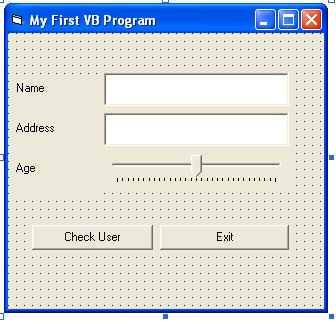
| Command Button 1 | Command Button 2 | Label 1 | Label 2 | Label 3 | |
| Name | cmdCheck | cmdExit | lblName | lblAddress | lblAge |
| Caption | Check User | Exit | Name | Address | Age |
| Text Box 1 | Text Box 2 | |
| Name | txtName | txtAddress |
| Text | <make it empty> | <make it empty> |
| Slider 1 | |
| Name | sliAge |
| Min | 0 |
| Max | 30 |
| Value | 15 |
It should look something like this:
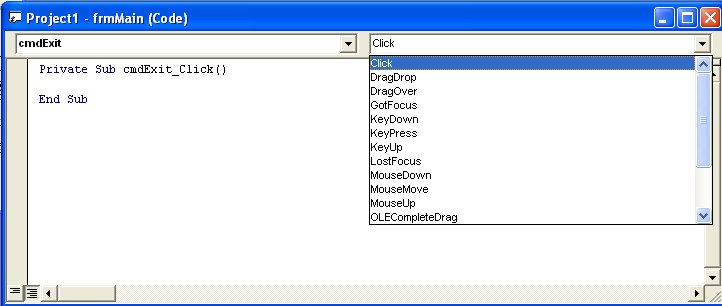
Private Sub cmdExit_Click()
End
End Sub
Private Sub Form_Load()
' this subroutine runs when your form first appears
' we will change some properties of our controls at startup
' to access a control's property, type the name of the control, then a period, and
' finally the property's name
txtName.Text = ""
txtAddress.Text = ""
sliAge.Value = 15
End Sub
Private Sub cmdCheck_Click()
' check the text property of txtname
If txtName.Text = "Carman" Then
MsgBox "You rock!", vbOKOnly, "Name Validation"
Else
MsgBox "Error", vbCritical, "Name Validation"
End If
' check the value property of sliAge
If sliAge.Value < 5 Then
MsgBox "Youngin'", vbOKOnly, "Age Validation"
ElseIf sliAge.Value >= 5 And sliAge.Value < 18 Then
MsgBox "How's school going?", vbOKOnly, "Age Validation"
Else
MsgBox "Start planning your life...", vbOKOnly, "Age Validation"
End If
' reset our controls' properties
txtName.Text = ""
txtAddress.Text = ""
sliAge.Value = 0
End Sub